Planning a Bathroom Installation in Kent: A Step-by-Step Guide

Planning a Bathroom Installation in Kent: A Step-by-Step Guide

Planning a Bathroom Installation in Kent: A Step-by-Step Guide

When planning a bathroom installation in Kent, start by setting a realistic budget, estimating costs for materials, labor, and permits, plus a contingency fund. Next, choose durable and slip-resistant materials, like porcelain tiles. Design your layout to optimize space and enhance functionality, considering traffic flow. Hire qualified local contractors with good reviews, and guarantee compliance with local permits and building regulations. Each step is essential for a successful installation; keep exploring for more valuable insights.

Key insights

  • Begin with a detailed budget that includes materials, labor, permits, and a contingency fund of 10-20% for unexpected costs.
  • Choose durable, slip-resistant materials like porcelain or ceramic tiles, and consider water-efficient fixtures for sustainability.
  • Design a functional layout by assessing space size, optimizing storage solutions, and ensuring smooth traffic flow throughout the bathroom.
  • Research and hire qualified local contractors, ensuring they have proper licensing, insurance, and positive reviews from previous clients.
  • Familiarize yourself with local regulations, zoning laws, and necessary permits to ensure compliance and avoid potential fines during installation.

Setting a Realistic Budget

When you're planning a bathroom installation, it's crucial to set a realistic budget to guarantee the project stays on track and within financial limits. Start by conducting a thorough cost estimation, factoring in materials, labor, and any necessary permits. Don’t forget to include a contingency fund for unexpected expenses, which can arise from unforeseen plumbing issues or structural repairs. Aim for a buffer of at least 10-20% of your total budget to accommodate these surprises. By anticipating potential costs, you’re more likely to avoid financial strain and maintain control over your project. Remember, a well-planned budget not only facilitates smoother execution but also enhances the overall success of your bathroom installation.

Choosing the Right Materials

With your budget in place, the next step is selecting the right materials for your bathroom installation. Start with tile selection; consider durability, slip resistance, and maintenance. Porcelain and ceramic tiles are popular for their resilience and ease of cleaning. Choose a size and pattern that complements your space, keeping in mind the visual flow.

Next, evaluate fixture options, including faucets, sinks, and toilets. Look for water-efficient models that balance functionality with style. Materials like stainless steel or chrome offer modern aesthetics, while traditional fixtures in brass or bronze can add classic charm. Verify that your selected materials align with your overall design vision and maintain a cohesive look throughout your bathroom. Quality materials will enhance both durability and appearance.

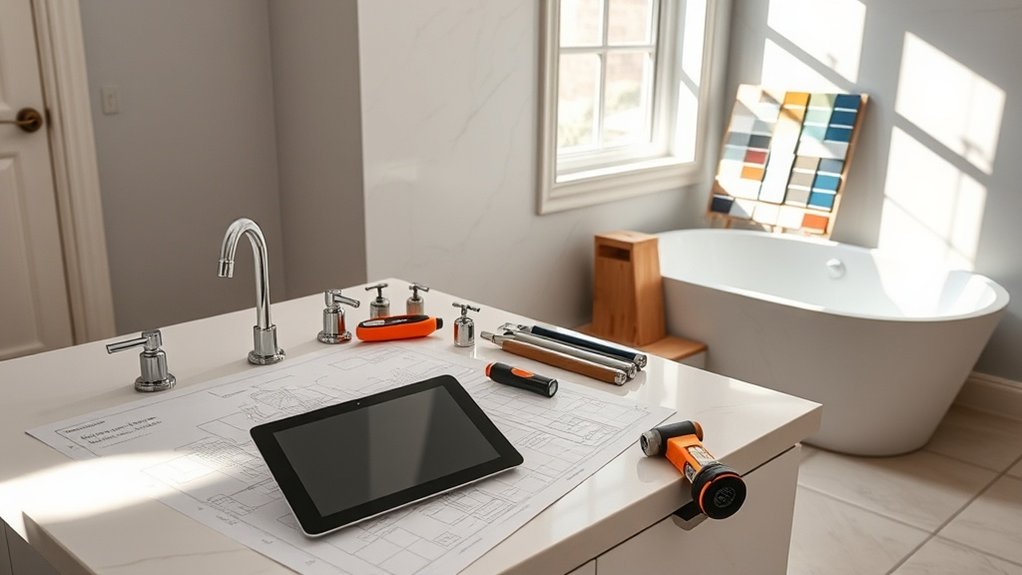
Designing Your Ideal Layout

To create a functional and aesthetically pleasing bathroom, you'll want to carefully consider your layout. Start by exploring various layout styles, such as the traditional, modern, or compact designs that best suit your needs. Assess the size and shape of your space to determine the most efficient arrangement for fixtures like the toilet, sink, and shower or bathtub. Prioritize space optimization; you might want to incorporate built-in storage solutions to maximize utility without compromising on style. Consider traffic flow to guarantee that movement within the space feels natural and unobstructed. By focusing on these elements, you can design a bathroom layout that enhances both functionality and visual appeal, ultimately creating a serene retreat that meets your daily needs.

Hiring Local Contractors

After finalizing your bathroom layout, the next step involves hiring local contractors who can bring your vision to life. It’s essential to evaluate contractor qualifications and gather insights from local reviews to guarantee you select the right professional for the job. Here are key factors to take into account:

  • Experience: Look for contractors with a proven track record in bathroom installations.
  • Licensing: Verify they're licensed and insured to protect your investment.
  • References: Request references from previous clients to gauge satisfaction.
  • Estimates: Obtain detailed estimates to compare pricing and scope of work.

How do you navigate the maze of permits and regulations when planning your bathroom installation? Start by understanding zoning laws in your area; these dictate what can be done on your property. Check with your local council to guarantee compliance with specific requirements. Next, focus on researching building codes that apply to bathroom installations. These codes cover plumbing, electrical work, and safety standards, making sure your project meets legal requirements. Depending on the complexity of your installation, you may need to apply for permits, which can involve submitting plans and paying fees. Remember, failing to comply can result in fines or having to redo work, so thorough preparation is essential for a smooth installation process.

Frequently Asked Questions

How Long Does a Typical Bathroom Installation Take?

A typical bathroom installation takes about one to two weeks, but bathroom timelines can vary considerably based on several installation factors. These include the complexity of the design, the quality of materials chosen, and the need for plumbing or electrical updates. If you’re planning a remodel, make sure you consider these aspects, as they can extend the project duration. Proper planning helps you manage expectations and achieve a smoother installation process.

Can I Install a Bathroom Myself?

Yes, you can install a bathroom yourself, but there are several DIY considerations to keep in mind. You’ll need to assess your plumbing and electrical skills, as well as local building codes. Prepare a list of tool requirements, including wrenches, saws, and tile cutters. Make sure you’re comfortable with each task, from framing to finishing. If you're unsure, consulting a professional can save you time and prevent costly mistakes.

What Are Common Bathroom Installation Mistakes to Avoid?

To avoid common bathroom installation mistakes, pay close attention to plumbing errors and design oversights. Make certain your plumbing connections are secure and leak-free; double-check your measurements before cutting materials. Don't overlook ventilation needs, as inadequate airflow can lead to mold. Also, consider the layout carefully; a poorly designed space can hinder functionality. Finally, always adhere to local building codes to prevent costly adjustments later on.

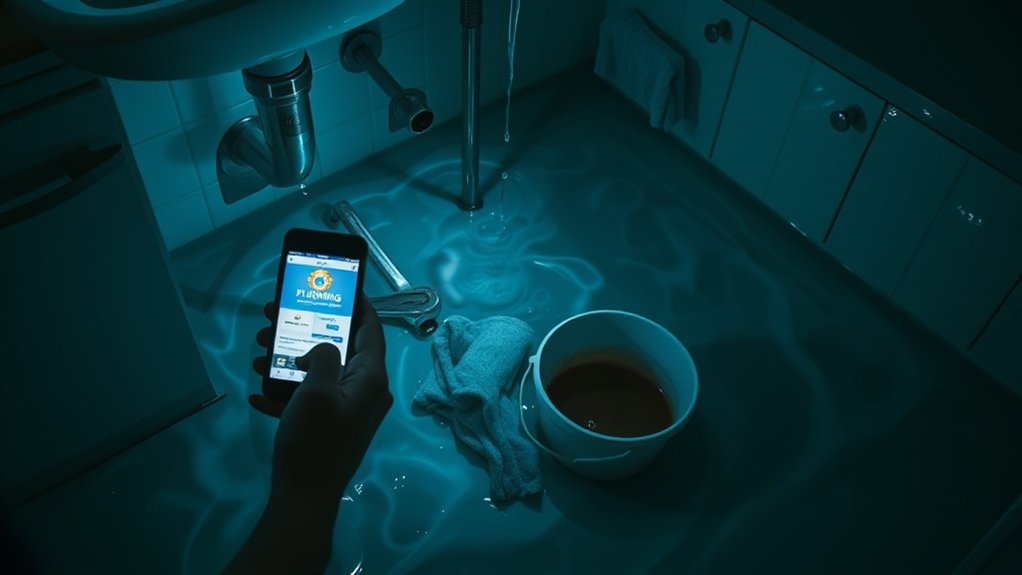
How Do I Handle Unexpected Issues During Installation?

When facing unexpected issues during installation, stay calm and assess the situation. Identify the cause of the delay and determine its impact on your timeline. You may need to make budget adjustments to accommodate additional expenses. Communicate with your contractor to explore solutions and alternatives. Prioritize essential tasks to maintain progress. Document any changes to keep track of your project, ensuring you stay on schedule and within budget.

What’s the Best Way to Maintain My New Bathroom?

To maintain your new bathroom effectively, focus on regular cleaning and moisture control. Use non-abrasive cleaners to avoid damaging surfaces, and wipe down fixtures frequently to prevent buildup. Guarantee proper ventilation to minimize humidity; consider using an exhaust fan. Invest in mildew-resistant products for added protection. Regularly check for leaks and repair them promptly to maintain the integrity of your bathroom. Following these cleaning tips will keep your space looking fresh and functional.

Summary

By following this step-by-step guide for your bathroom installation in Kent, you’re setting yourself up for a successful project. You’ve established a realistic budget, chosen quality materials, designed a functional layout, and selected skilled local contractors. Don’t forget to navigate through the necessary permits and regulations to guarantee compliance. With careful planning and execution, your dream bathroom is within reach, enhancing both your home’s value and your daily living experience.

Emergency Plumbing in Rochester: What to Do Before the Plumber Arrives

Emergency Plumbing in Rochester: What to Do Before the Plumber Arrives

Emergency Plumbing in Rochester: What to Do Before the Plumber Arrives

In an emergency plumbing situation in Rochester, start by identifying the problem through visual inspections and leak detection methods. Shut off the main water supply and drain faucets to prevent further damage. Contain leaks with towels and buckets, and clear the area of obstacles for easy access. Gather necessary tools and prepare a detailed description for the plumber. Understanding these steps can help streamline the repair process and minimize damage, so there’s much more to explore.

Key insights

  • Conduct a thorough inspection for visible leaks, noting locations and extent of damage to assist the plumber in diagnosis.
  • Shut off the main water supply to prevent further damage and drain faucets to relieve pressure in the system.
  • Contain leaks by using towels to absorb water and setting up buckets to collect drips while moving valuable items out of the affected area.
  • Clear the area of obstacles for easy plumbing access and ensure safety by avoiding electrical outlets during leaks.
  • Prepare a detailed description of the plumbing issue and gather emergency supplies to facilitate quicker assistance from the plumber.

Identify the Problem

When faced with a plumbing emergency, how can you quickly identify the problem? Start by conducting a thorough pipe inspection. Look for visible signs of leaks, such as water stains, dampness, or mold around fixtures and walls. If you suspect a leak but can't see it, consider using leak detection methods. These can include listening for unusual sounds, checking your water meter for unexpected changes, or using moisture meters. Pay attention to your water pressure; a sudden drop might indicate a hidden leak. By pinpointing the source of the issue, you can provide essential information to your plumber, helping them address the problem more efficiently when they arrive. Remember, quick identification can save you time and money.

Shut Off the Water Supply

When faced with a plumbing emergency, your first step is to shut off the water supply. Start by locating the main valve and turning it off to prevent further damage. After that, make sure to turn off any appliances and drain faucets and fixtures to minimize water accumulation.

Locate the Main Valve

Locating the main valve is vital for effectively managing plumbing emergencies. This valve controls your home’s water supply, and knowing its location can save you from extensive damage. Main valve types typically include gate valves and ball valves, which you'll find in various places. Common valve locations are near your water meter, in basements, or outside the house. If you have a crawl space, check there as well. Once you've identified the valve, familiarize yourself with how it operates, as quick access can be essential during a crisis. Make a note of its location and guarantee everyone in your household knows where to find it. Being proactive can prevent further complications and help you manage the situation effectively.

Turn off Appliances

After locating the main valve, your next step is to turn off the water supply to any appliances that may be affected by the plumbing issue. This includes dishwashers, washing machines, and refrigerators with water lines. Turning off these appliances helps prevent further damage and guarantees appliance safety. Locate the individual shut-off valves for each appliance, usually found behind or beneath them. Simply twist the valve clockwise to stop the water flow. If you can't find the specific valves, shutting off the main water supply will suffice temporarily. Remember, you want to minimize any potential leaks or flooding while you wait for the plumber. Taking these proactive steps will protect your home and appliances during this emergency.

Drain Faucets and Fixtures

Once you've turned off the water supply, it’s essential to drain faucets and fixtures to relieve any remaining pressure in the system. Start by opening all the faucets, beginning with the highest point in your home and working your way down. This guarantees that air can enter the pipes, allowing for complete drainage. Don’t forget to flush toilets to remove excess water. During this process, keep an eye out for any signs of leaks or clogs, as this can aid in your faucet troubleshooting. Proper drain maintenance involves checking for debris and buildup, which can lead to future issues. By taking these steps, you’ll minimize potential damage and make it easier for the plumber to address any concerns.

Assess the Damage

As you begin to address a plumbing emergency, evaluating the damage is essential for effective resolution. Start with a thorough damage assessment by conducting a visual inspection of the affected areas. Look for visible leaks, water stains, or structural damage, as these can indicate the severity of the issue. Check beneath sinks, around appliances, and in walls for any signs of moisture or mold growth. Document your findings, noting the locations and extent of the damage. This information will be valuable when the plumber arrives, allowing for a quicker diagnosis and repair. Acting swiftly not only minimizes further damage but also helps protect your home and possessions from potential hazards. Stay calm and focused during this vital step.

Gather Necessary Tools and Materials

Having assessed the damage, the next step involves gathering the necessary tools and materials to tackle the plumbing issue effectively. Having the right plumbing tools and essential materials on hand can make a significant difference in managing the situation until the plumber arrives. Here’s a quick list of what you might need:

  1. Plunger – This is vital for clearing clogs in toilets and sinks.
  2. Wrench – A pipe wrench or adjustable wrench helps loosen or tighten fittings.
  3. Towels or Rags – Keep these handy to soak up any spills and protect your flooring.

With these items ready, you’ll be better equipped to handle the emergency while waiting for professional assistance.

Clear the Area

Before starting any plumbing work, you need to clear the area of obstructions and furniture to guarantee an efficient process. Make sure you create a safe access path for yourself and any tools you'll be using. Additionally, protect your flooring and carpets to prevent any damage during the emergency repair.

Remove Obstructions and Furniture

To effectively address plumbing emergencies, clearing the area of obstructions and furniture is essential. This not only helps the plumber navigate but also prevents additional damage to your belongings. Use these removal techniques to facilitate a smoother process:

  1. Identify furniture placement**: Determine which items block access to the plumbing and prioritize their removal.
  2. Carefully lift or slide: If it’s safe, gently lift or slide furniture out of the way rather than dragging, to avoid scratches or damage.
  3. Clear small items: Remove any small objects, such as plants, decor, or rugs, that could hinder the plumber’s movements.

Ensure Safe Access Path

Once you've cleared obstructions and furniture, the next step is to confirm a safe access path for the plumber. Verify the access route is free from any hazards, such as loose cords, rugs, or debris that could cause tripping. If the plumbing issue is in a tight space, like a bathroom or basement, make certain there’s enough room for the plumber to move comfortably and carry their tools. Implementing these safety measures not only helps the plumber do their job efficiently but also minimizes the risk of accidents. Communicate any specific concerns about the area to the plumber upon arrival. A clear and safe work environment will expedite the repair process and enhance overall safety for everyone involved.

Protect Flooring and Carpets

While preparing for a plumbing emergency, it’s important to protect your flooring and carpets from potential damage. Here are some effective steps you can take:

  1. Remove Furniture: Clear the area by moving any furniture away from the affected space. This not only prevents damage but also allows the plumber to work efficiently.

  2. Use Water Resistant Coverings**: Lay down water resistant coverings, such as plastic sheets or tarps, to shield your floors and carpets from spills or leaks.

  3. Secure Loose Items: Pick up any loose items, like rugs or decor, to prevent them from becoming damaged or obstructing the plumber's access.

Taking these precautions can help minimize damage and promote a smoother plumbing repair process.

Take Photos for Insurance Purposes

Taking clear and detailed photos of the damage is vital for your insurance claim after a plumbing emergency. Start by capturing the affected areas from multiple angles to provide an all-encompassing view. Confirm the photos highlight the extent of the damage, including any water stains, structural issues, or damaged belongings. This photo evidence will serve as significant insurance documentation when you file your claim. Don’t forget to include close-ups of any visible leaks or broken fixtures, as these details can support your case. Additionally, timestamp your photos if possible, as this information can further validate your claim. By documenting the situation thoroughly, you’ll help facilitate a smoother claims process and increase the likelihood of receiving the compensation you deserve.

Use Towels or Buckets to Contain Leaks

After documenting the damage with photos, your next step is to contain any leaks to prevent further issues. Effective leak containment is essential in minimizing water damage. Here’s how to manage the situation:

  1. Use emergency towels**: Place them underneath the leak to absorb excess water and prevent it from spreading.
  2. Set up buckets: If the leak is significant, position buckets to collect dripping water. This will keep your floors safe and dry.
  3. Check for nearby items: Move valuable items away from the leak area to protect them from potential damage.

Avoid Using Electrical Outlets

As water begins to accumulate from a leak, it’s essential to avoid using electrical outlets in the affected area. This precaution is crucial for your safety, as water and electricity can create dangerous conditions. Outlet hazards can lead to short circuits, electrical shocks, or even fires. If you notice water near an outlet, don't plug in or unplug any devices, and turn off the power supply to that area if possible. Prioritizing electrical safety not only protects you but also prevents further damage to your home’s electrical system. While waiting for the plumber, keep the area dry as much as you can, and inform anyone nearby about the potential dangers of using electrical outlets in that space.

Know When to Call for Help

When facing a plumbing issue, it's vital to recognize the signs of an emergency. You should assess the severity of the damage and gather essential information before deciding to call for professional help. Knowing when to reach out can save you time, money, and further complications.

Identify Plumbing Emergencies

How can you tell if your plumbing issue is truly an emergency? Recognizing emergency signs can save you from further damage and costly repairs. Here are three key indicators that require immediate attention:

  1. Severe Water Leaks: If you notice a significant water leak, especially if it’s rapidly increasing, it can cause extensive damage to your home.

  2. Clogged Drains: A completely clogged drain that prevents water from flowing can lead to overflowing and additional plumbing issues.

  3. No Water Supply: If you suddenly lose all water pressure, it could indicate a serious problem that needs urgent resolution.

If you face any of these situations, don’t hesitate to call a plumber right away to avoid worsening the issue.

Assess Damage Severity

Determining the severity of plumbing damage is vital before deciding whether to call for professional help. Start by conducting a damage assessment; check for leaks, water pooling, or signs of structural damage. If you notice significant water flow or flooding, it’s imperative to initiate an emergency response immediately. Small leaks may be manageable, but large bursts or extensive damage require expert attention. Evaluate the risk of secondary damage, such as mold growth or electrical hazards, which can escalate the situation. If you’re unsure about the extent of the damage, err on the side of caution and contact a plumber for guidance. Being proactive can prevent further complications and guarantee your home remains safe and secure.

Gather Essential Information

Once you've assessed the damage severity, it's important to gather essential information to determine if you need professional plumbing assistance. Having the right details can help your plumber resolve the issue faster. Here are three key pieces of information to collect:

  1. Emergency Contacts: Have the phone numbers of your preferred plumbing services ready. This guarantees you can reach out quickly if needed.

  2. Description of the Problem: Note specific plumbing terminology related to the issue, such as leaks, clogs, or bursts. This helps the plumber understand the situation better.

  3. Location of the Problem: Identify where the issue is occurring, whether it’s in the kitchen, bathroom, or basement. This aids in a quicker response.

Gathering this information can make a significant difference in your emergency plumbing situation.

Communicate With the Plumber

Effective communication with your plumber is essential during an emergency plumbing situation. Start by providing clear instructions about the issue at hand. Describe the problem in detail—what you’ve observed, when it started, and any steps you've already taken. This plumber communication helps the professional understand the urgency and scope of the situation. Don’t hesitate to share any relevant information about your plumbing system, including age and previous repairs. If possible, send photos to illustrate the issue. This proactive approach not only aids in quicker diagnosis but also allows the plumber to arrive prepared with the necessary tools and parts. Remember, the clearer you are, the more effective the plumber can be in resolving your emergency promptly.

Prepare for the Plumber's Arrival

While waiting for the plumber to arrive, it's crucial to take a few steps to guarantee the process goes smoothly. Here’s how you can prepare:

  1. Gather plumbing tools: If you have basic plumbing tools on hand, collect them. This helps the plumber understand the situation better and may expedite the repairs.

  2. Locate emergency supplies: Verify you have essential emergency supplies ready, like towels or buckets, to minimize water damage while you wait.

  3. Clear the area: Remove any obstacles around the plumbing issue. This gives the plumber easy access and speeds up the repair process.

Follow Up After Repairs

After the plumber finishes the repairs, it's important to follow up to verify everything is functioning properly and to prevent future issues. Start by inspecting the repaired area for leaks or unusual sounds. Test the fixtures to confirm they’re operating as expected. Document any concerns you may have to discuss with the plumber if necessary. Implementing follow up procedures helps confirm your repair satisfaction and verifies that the problem is fully resolved. If you notice any issues, contact your plumber promptly to address them under warranty. Additionally, keeping a record of the repairs can be beneficial for future reference. By being proactive, you can maintain your plumbing system and avoid recurring problems down the line.

Frequently Asked Questions

What Are Common Plumbing Emergencies in Rochester?

Common plumbing emergencies in Rochester include burst pipes and clogged drains. When temperatures drop, pipes can freeze and burst, causing significant water damage. On the other hand, clogged drains can lead to backups and unpleasant odors, requiring immediate attention. If you experience either of these issues, it’s essential to act quickly. Turn off your water supply and avoid using the affected fixtures until a professional can assess and resolve the problem effectively.

How Can I Prevent Plumbing Emergencies in the Future?

To prevent plumbing emergencies in the future, you should follow essential plumbing maintenance tips. Schedule regular inspections to identify potential issues early. Keep an eye on your pipes for leaks, and avoid flushing non-degradable items down the toilet. Confirm your drains are clear by using strainers, and regularly clean your fixtures. Insulate your pipes during winter to prevent freezing. By staying proactive, you'll minimize the risk of costly plumbing problems down the line.

What Should I Do if I Smell Gas?

If you smell gas, it’s vital to act immediately. Evacuate everyone from the building and avoid using any electrical devices or flames. Once you're safely outside, call your local emergency response team to report the gas leak. Don’t re-enter until professionals declare it safe. It’s essential to stay calm and prioritize safety; gas leaks can lead to serious hazards if not handled properly. Your quick actions can prevent disaster.

Are There DIY Fixes for Minor Plumbing Issues?

Yes, there are DIY fixes for minor plumbing issues. For a leaky faucet, you can often replace the washer or O-ring to stop the drip. Start by turning off the water supply, disassembling the faucet, and swapping out the worn parts. For a clogged drain, try using a plunger or a mixture of baking soda and vinegar to clear the blockage. Always guarantee you have the proper tools handy before starting your repairs.

How Much Does Emergency Plumbing Typically Cost?

Emergency plumbing costs can vary widely, typically ranging from $100 to $500 or more, depending on the issue and time of day. You'll often encounter service fee estimates that include a base charge plus additional costs for parts and labor. It's essential to ask for a detailed breakdown before the work begins. Knowing this can help you budget better and avoid surprises when the plumber presents the final bill.

Summary

When facing a plumbing emergency in Rochester, taking these proactive steps can make a significant difference. By identifying the problem, shutting off the water supply, and preparing the area, you not only minimize damage but also promote a smoother repair process. Clear communication with your plumber is key to effective service. Once the repairs are complete, follow up to verify everything's functioning properly. Being prepared helps you handle emergencies efficiently and keeps your home safe and dry.